Mums, finally this article came out. There are tonnes of information about it around there, especially videos in youtube, but I will make it anyway. You know how I like to explain things in an easy way for you, don’t you?
If you are not familiar with what Google Adsense is, you can read my post about it, clicking here.
WHAT YOU SHOULD KNOW BEFORE CREATING A GOOGLE ADSENSE ACCOUNT
1. Do not, ever, give INVALID CLICKS. That means:
- Do not click in your own advertisement. Google can easily identify them and close your Adsense account, excluding you forever!
- Do not ask friends, relatives or even your blog readers to click in your advertisement. It can be detected easily. Remember how people are connected and found nowadays in Social Media. Google could detect that in the twinkling of an eye.
- Do not use programs that generate automatic clicks. That is a Black Hat technique and could finish with all your efforts.
2. Be sure you have enough content.
You can be rejected if you are trying to put Google advertisement on a website with only 4 posts, for example. Even if there is not a consensus about the number of articles, try to apply when you have around 20 articles.
3. Have original content, with quality.
Do not duplicate the information. It can also be a reason for being rejected. To be sure you are not duplicating information you can check it in Copyscape.
4. Check your backlinks.
Always provide links with quality and which are working. Sometimes you mention a website and later it is not working anymore so you will have a dead link. That counts for SEO results and also when you are applying for Adsense.
5. Wait for at least one month to apply again in case your website is rejected by Adsense.
HOW TO CREATE A GOOGLE ADSENSE ACCOUNT?
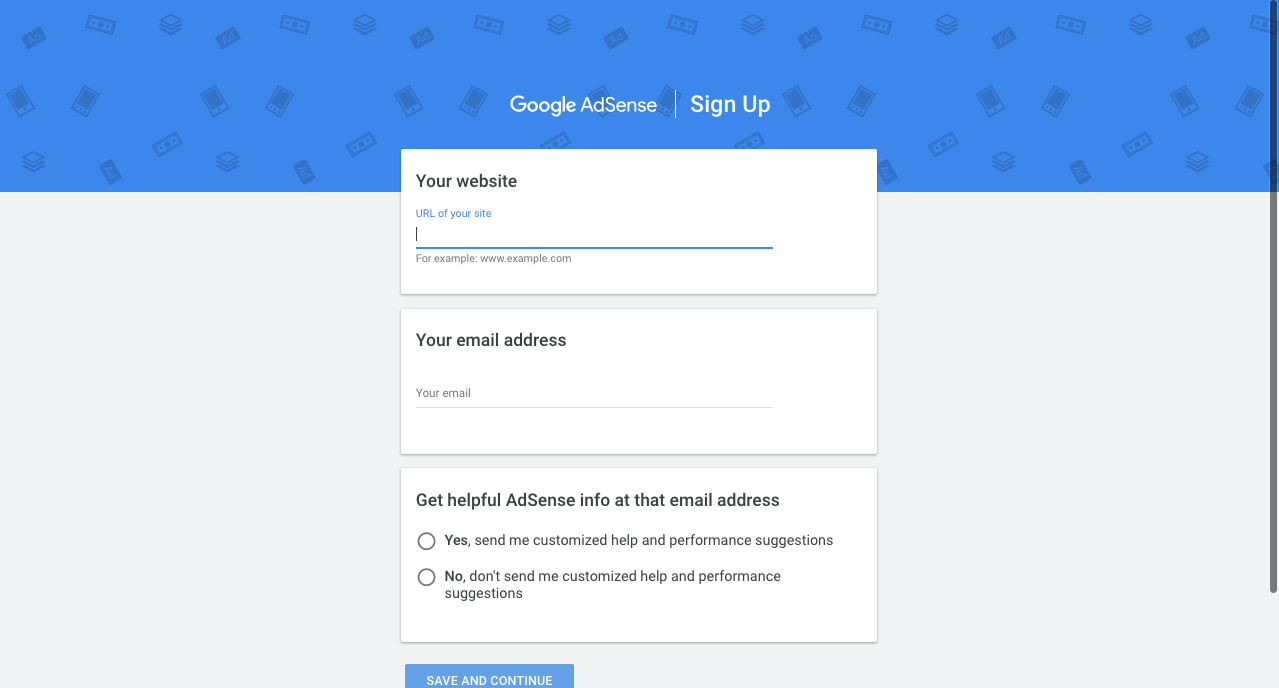
1. Firstly you must enter the Adsense page and sign up.
- Fill in the information they ask you for (like in the image below).
- You must have a Gmail account.
- You must be the owner of a website with unique content (not duplicated).
2. Give and validate your phone number, address, and bank account.
After saving the information when you signed up, you must sign in, give your address, phone number and choose the payment method, in order to proceed with your Google Adsense account.
To be sure you are giving them the right phone number, Google will send you a code to your phone (you can choose if you want to receive the code by SMS or voice message) and you will have to insert the 6-digit verification code in the website. After click on “submit”.
The address you gave will also be verified when your earnings reach the verification threshold (usually 10 dollars, but will depend on the country you are living in. Please check that information here).
To verify the accuracy of your bank account information, when you reach the threshold, Google will deposit a very small amount of money there. You will have to check in your bank account the following days and write on the website that value. Only then, they will deposit the full amount in your bank account.
After this first stage, only when you reach an amount of 100 dollars approx. , you will receive your next payment. This is one of the disadvantages if you do not have much traffic or clicks on your website. It can take months or even years, but the intention is that you try to increase your traffic and do it, of course.
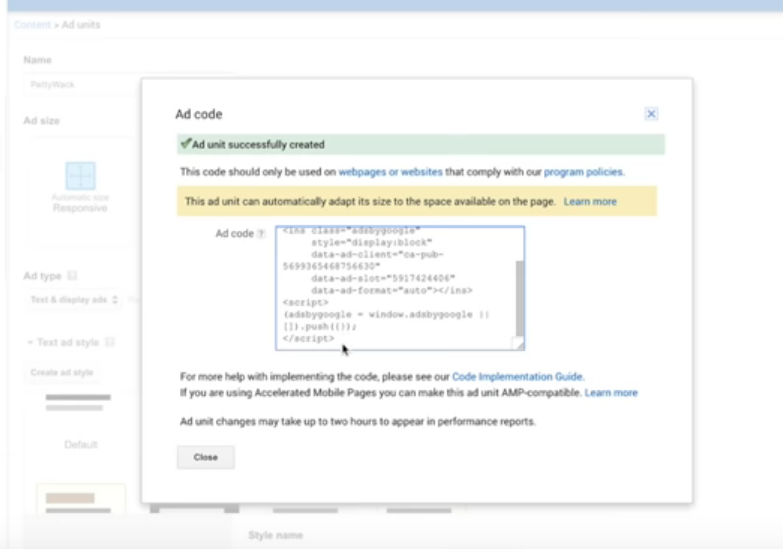
3. Add and choose the type of advertisement for your website.
After you signed up and gave detailed information about your telephone number, address and bank account, it is time for the next step.
Enter your Adsense account, and click on “New ad unit”, as you see in the image below
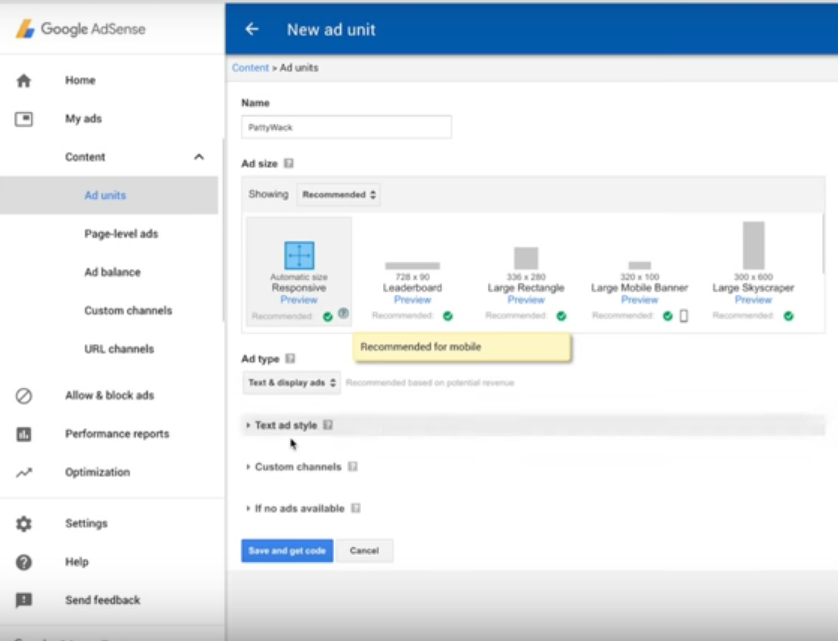
I recommend you to choose the “responsive” option, in which Adsense will adjust the advertisement according to your website structure. However, you can explore the different options and choose the one that fits your taste better.
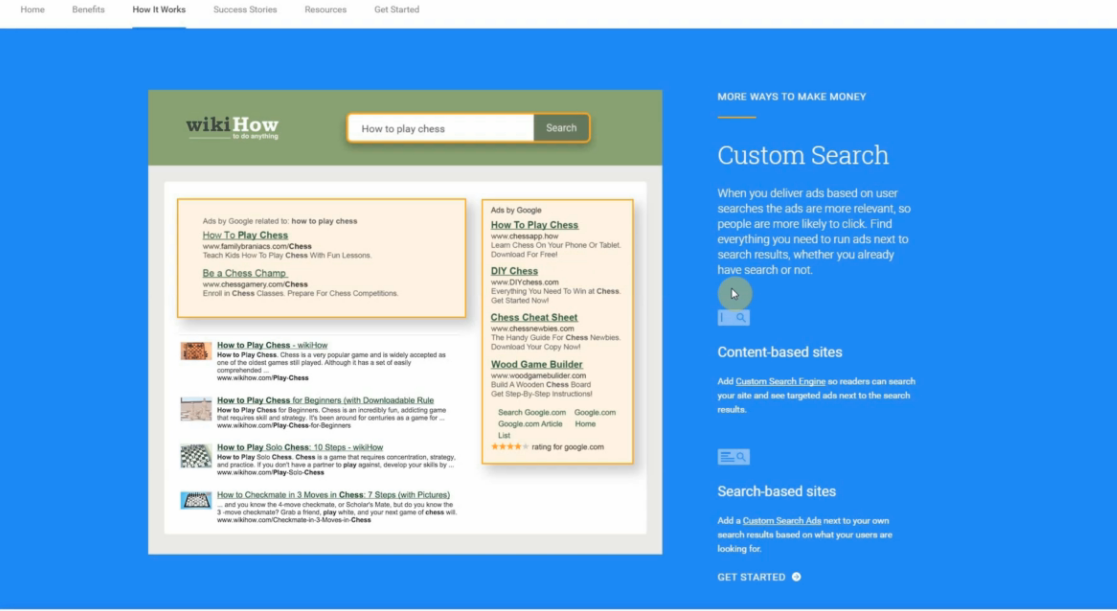
I would tell you also not to choose just text ads. They look a bit outdated, like the one you see in this image.
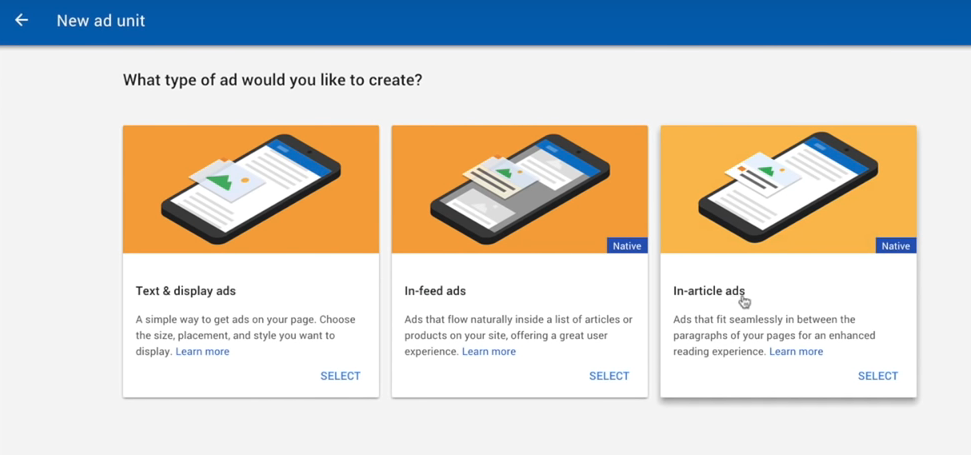
In-article ads can be the most appropriated because they appear between paragraphs and will help to enhance a better reading experience, like the ones you can see in my blog.
In-feed ads can bring you more clicks because it makes people think that it is a post, but in the end, maybe you will not have loyal visitors because they can feel cheated.
After you choose the type of advertisement, Google Adsense will generate a code that you will have to insert in your website. It is something like this:
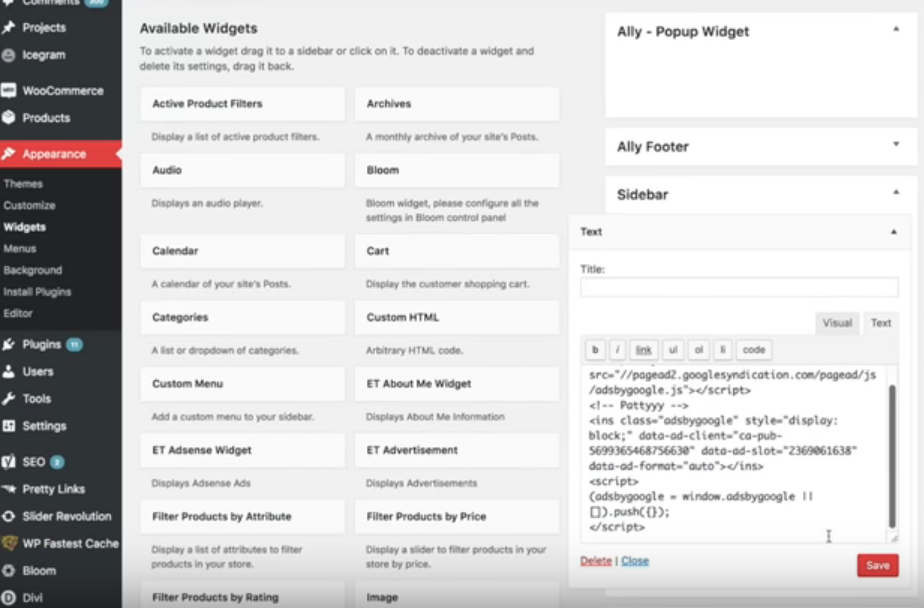
4. Insert the codes in your website (WordPress, youtube, blogger, etc).
Once I have WordPress I will show you where to insert the code here. You just have to enter in costumize>appearance>widgets>text and insert there the code.
5. Wait for Google Adsense approval
Once it is the first time you will have to wait for Adsense approval. It can take one day, one week or even a month, to have your advertisement working. It will depend if your website was already detected by crawling and also if it is according to Adsense rules.
Hope this article was useful to you. Let me know if you have any question.